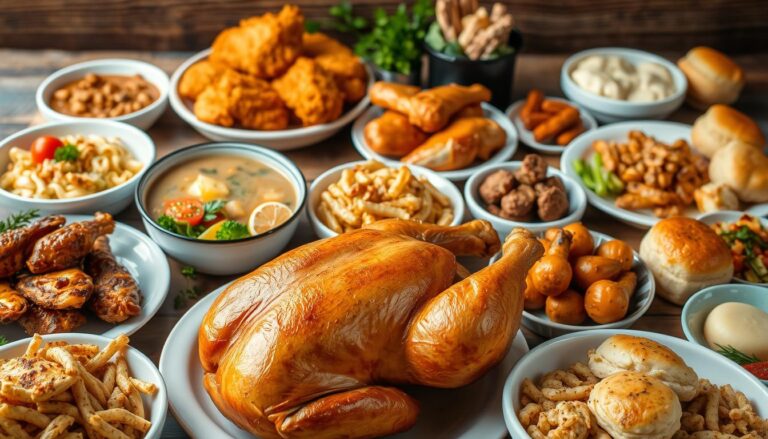
Perfect Fried Chicken Recipe – Restaurant Quality at Home
Growing up in a Southern kitchen, I learned that perfect crispy fried chicken is more than just a meal. It’s a cherished tradition passed down through generations. The sizzle of chicken hitting hot oil, the golden-brown crust crackling with each bite, brings back memories of family gatherings and Sunday dinners that warm the heart.
Your search for the ultimate crispy fried chicken recipe ends here. This recipe combines generations of cooking wisdom with professional culinary techniques. It delivers a flavorful fried chicken that will make your taste buds dance. Whether you’re a home cook or a kitchen novice, you’ll master the art of creating restaurant-quality chicken right in your own kitchen.
What makes this recipe special is its foolproof approach to achieving that perfect crispy exterior and juicy interior. From the buttermilk soak to the perfectly seasoned coating, every step is designed to create a mouthwatering dish. This dish will have everyone asking for seconds.
Key Takeaways
- Master the secret to ultra-crispy fried chicken
- Learn professional techniques for maximum flavor
- Understand the importance of proper marinating
- Discover temperature control secrets
- Create restaurant-quality chicken at home
The Secret to Perfect Crispy Fried Chicken
Making the best buttermilk fried chicken is more than just mixing ingredients. It’s a skill that needs precise techniques, knowing your ingredients, and mastering cooking methods.
To get that golden, crispy outside and juicy inside, focus on three key areas: preparation, coating, and frying at the right temperature.
Understanding the Buttermilk-Flour Method
The buttermilk-flour method is key to amazing fried chicken. Soaking chicken in buttermilk tenderizes it. This makes the meat soft and juicy.
- Buttermilk adds a tangy taste
- It softens the chicken meat
- It’s great for soaking up flavors
Why Temperature Control Matters
Controlling the frying temperature is vital for a crispy outside. The oil’s temperature affects how the chicken cooks. It changes both its texture and taste.
- Ideal frying temperature: 325-350°F
- Too low: greasy chicken
- Too high: burnt outside, raw inside
The Role of Seasonings
Seasonings make a good buttermilk fried chicken unforgettable. The right mix of spices can turn it into a memorable dish.
- Salt and pepper give a basic flavor
- Paprika adds depth and color
- Cayenne adds a bit of heat
By learning these techniques, you’ll make fried chicken that’s crispy, flavorful, and will wow everyone.
Essential Ingredients for Classic Fried Chicken
Creating the perfect fried chicken starts with the right ingredients. Your journey begins with the key components that make chicken crispy and flavorful.
Choosing the best chicken cuts is key. Chicken thighs and drumsticks are top picks for their rich flavor and moisture. Make sure the meat is fresh and of high quality for the best taste and texture.
- Chicken pieces (thighs, drumsticks)
- Buttermilk for tenderizing
- All-purpose flour for coating
- Salt and black pepper
- Paprika for added flavor
Vegetable oil is the best for frying chicken. It has a high smoke point and a neutral flavor. This lets the chicken’s seasonings stand out. Peanut oil is also great, adding a nutty taste to your fried chicken.
Your seasoning blend is vital for a memorable flavor. A mix of salt, black pepper, and paprika offers a classic taste. Feel free to add spices like garlic powder or cayenne for more flavor.
| Ingredient | Purpose | Recommended Amount |
|---|---|---|
| Chicken Pieces | Protein Base | 2-3 lbs |
| Buttermilk | Tenderizing | 2 cups |
| Vegetable Oil | Frying Medium | 4-6 cups |
Quality ingredients are what set great fried chicken apart. Take your time choosing each ingredient. You’ll get a dish that’s crispy, flavorful, and delicious.
The Ultimate Fried Chicken Recipe Step by Step
Mastering fried chicken recipe steps is all about precision and technique. Learning to fry chicken perfectly turns a simple meal into a crispy, golden treat. This guide will help you make restaurant-quality fried chicken at home.
Delicious fried chicken comes from three key stages. Each step is vital for a crispy outside and juicy inside.
Preparing the Buttermilk Soak
The buttermilk soak is your secret to tender, flavorful chicken. Here’s how to do it:
- Select fresh, high-quality chicken pieces
- Submerge chicken completely in buttermilk
- Add salt, pepper, and optional spices
- Refrigerate for 2-8 hours
Creating the Perfect Flour Coating
Your flour mixture is key to the crunchiness of your fried chicken. Here’s how to fry chicken with a spectacular coating:
- Mix all-purpose flour with seasonings
- Use a blend of paprika, garlic powder, and cayenne
- Create a dry, textured coating
- Shake off excess flour before frying
Mastering the Frying Technique
Temperature control is key when frying chicken. Here are some essential frying tips:
| Chicken Part | Oil Temperature | Cooking Time |
|---|---|---|
| Chicken Breasts | 350°F | 12-15 minutes |
| Chicken Thighs | 325°F | 15-18 minutes |
| Chicken Wings | 375°F | 8-10 minutes |
Pro tip: Always use a meat thermometer to ensure chicken reaches 165°F internal temperature for safe consumption.
How to Choose and Prepare Your Chicken

Choosing the right chicken is key for a tasty fried chicken dish. The best cuts for frying can greatly impact your dish. Look for fresh, uniform pieces with the right meat and skin balance.
When getting ready to fry chicken, consider these main options:
- Whole chicken cut into pieces
- Pre-cut chicken parts
- Mix of different chicken cuts
A four-pound chicken is ideal for a family meal. Chefs suggest mixing dark and white meat for varied textures and tastes.
| Chicken Cut | Flavor Profile | Cooking Time |
|---|---|---|
| Thighs | Rich, juicy | 12-15 minutes |
| Drumsticks | Tender, flavorful | 10-12 minutes |
| Breasts | Lean, mild | 8-10 minutes |
| Wings | Crispy, quick-cooking | 6-8 minutes |
Always clean your chicken well and dry it with paper towels before frying. Remove excess fat and make sure pieces are the same size for even cooking. This way, your fried chicken will be crispy, golden, and delicious every time.
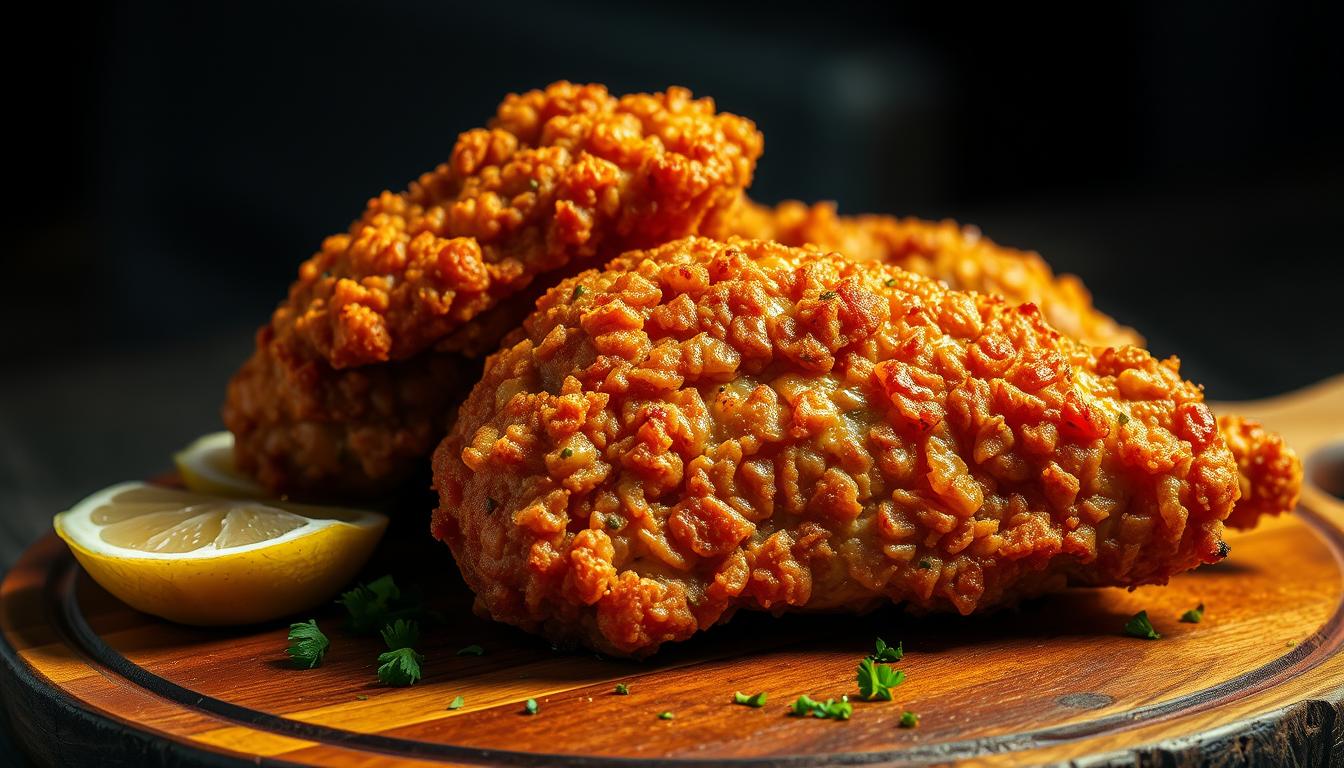
Creating the Perfect Crispy Coating
Making a crispy chicken coating is an art. It turns ordinary chicken into a golden, crunchy treat. The key is to master a few techniques.
The double-dredging method is key to a crunchy exterior. You coat the chicken twice. This makes the coating thick and crispy, delighting your taste buds.
Mastering the Double-Dredging Technique
To get the double-dredging right, follow these steps:
- Start with a buttermilk marinade to tenderize the chicken
- Create a seasoned flour mixture with your favorite spices
- Dip the chicken in flour, then buttermilk, then flour again
- Shake off excess coating to prevent clumping
The Importance of Resting Time
After dredging, let your chicken rest on a wire rack for 8-10 minutes. This waiting period is key. It lets the coating set, so it doesn’t fall off when frying.
Resting is based on simple science. It makes the flour stick better to the chicken. This results in a crunchier exterior. Your patience will pay off with crispy fried chicken that’s restaurant-quality.
Temperature Control and Cooking Times

Getting the frying temperature right is key to perfect fried chicken. You need to balance heat and timing to get it just right.
The best oil temperature is between 325–350°F. This range helps your chicken cook evenly and prevents it from burning. Keeping the heat steady also stops the chicken from getting too greasy.
- Use a reliable digital thermometer to monitor oil temperature
- Avoid overcrowding the pan, which can lower oil temperature
- Adjust heat as needed to maintain steady temperature
Different chicken parts need different cooking times. Thighs and drumsticks take 12-15 minutes, while breasts need 8-12 minutes. Always check the chicken’s internal temperature with a meat thermometer.
| Chicken Cut | Cooking Time | Target Internal Temp |
|---|---|---|
| Chicken Thighs | 12-15 minutes | 165-175°F |
| Chicken Breasts | 8-12 minutes | 160-165°F |
Pro tip: Let chicken rest for 5-10 minutes after frying. This helps the juices spread evenly, making each bite tender and tasty.
Caribbean-Style Flavor Variations
Make your Caribbean fried chicken pop with island-inspired seasonings. These flavors turn a simple dish into a tropical adventure. The Caribbean kitchen offers bold, exciting tastes that elevate your fried chicken.
Caribbean fried chicken is known for its special spice mix. These seasonings make your dish more than just fried chicken. They create a delicious experience unlike any other.
Spice Blend Options
Make your own Caribbean-style fried chicken seasonings with these ingredients:
- Fresh ground allspice
- Smoked paprika
- Dried thyme
- Garlic powder
- Cayenne pepper
Alternative Seasonings
For easy Caribbean fried chicken seasonings, try these:
- Sazón seasoning blend
- Tony Chachere’s Creole Seasoning
- Jamaican jerk seasoning
- Pimento-based spice mixes
Try different seasonings to find your favorite Caribbean fried chicken mix. Each blend adds a special flavor that takes you to the Caribbean.
Healthier Cooking Alternatives
Do you love fried chicken but want to cut down on calories? There are healthier ways to make it. Baked fried chicken and air fryer methods are great options. They let you enjoy your favorite dish without feeling guilty.
Baking chicken is a smart way to use less oil and keep it crispy. Here’s how to make a healthier version:
- Preheat your oven to 425°F
- Place dredged chicken on a wire rack over a baking sheet
- Lightly spray with cooking oil
- Bake for 35-40 minutes until golden and crisp
The air fryer is another great choice for healthy fried chicken. It uses little oil but gives a crunchy outside. Just follow these steps:
- Set air fryer to 375°F
- Arrange chicken pieces in a single layer
- Cook for 15-20 minutes
- Flip halfway through cooking
- Lightly spray with oil for extra crispiness
Both methods cut down on fat compared to deep-frying. Your taste buds won’t even notice the difference! These alternatives let you enjoy fried chicken more often while staying healthy.
Storage and Reheating Tips
Keeping your homemade fried chicken fresh and crispy is key. After you’ve enjoyed it, you’ll want to keep that amazing flavor and texture. Here’s how to do it right.
Storing fried chicken the right way keeps it tasty and safe. Follow these tips to enjoy your chicken for days to come:
- Let the fried chicken cool completely at room temperature
- Use shallow airtight containers for storing fried chicken
- Refrigerate within two hours of cooking
- Store in the refrigerator for up to 4 days
Smart Reheating Techniques
Reheating fried chicken can be a challenge. But, with the right method, you can make it crispy again. Avoid the microwave, as it makes the coating soggy.
- Preheat your oven to 375°F
- Place chicken on a wire rack over a baking sheet
- Heat for 8-10 minutes
- Finish at 425°F for 1-2 minutes to crisp the skin
Pro Storage Tips
For the best reheating results, wrap each piece in aluminum foil before storing. This keeps it moist and prevents drying. Always check the chicken’s internal temperature reaches 165°F when reheating.
Pro tip: Never leave fried chicken at room temperature for more than two hours to prevent bacterial growth.
Common Mistakes to Avoid
Mastering fried chicken means avoiding common mistakes. Knowing these errors can improve your cooking and make sure your chicken is always delicious.
Fixing fried chicken starts with spotting key errors. These mistakes can turn your crispy chicken into a soggy mess. Keeping the right temperature and preparing well are key to perfect fried chicken.
- Overcrowding the Frying Pot: Too many chicken pieces in the oil at once lowers the temperature, making the chicken soggy and greasy
- Incorrect Oil Temperature: Keeping the heat between 325-350°F is vital for a crispy outside and a juicy inside
- Skipping the Buttermilk Soak: The buttermilk marinade makes the meat tender and helps the coating stick better
- Uneven Coating: Make sure the flour covers the chicken evenly for even crispiness
Professional chefs say to fry chicken in small batches to keep the oil temperature right. Use a wire rack instead of paper towels to keep the bottom crispy. This way, excess oil drips off, keeping your chicken crunchy.
| Mistake | Consequence | Solution |
|---|---|---|
| Overcrowding | Soggy, greasy chicken | Fry in small batches |
| Wrong Temperature | Uneven cooking | Use thermometer, maintain 325-350°F |
| Inadequate Seasoning | Bland taste | Season flour and buttermilk marinade |
Fixing fried chicken takes patience and practice. By avoiding these mistakes, you’ll make fried chicken that’s crispy, flavorful, and perfectly cooked.
Conclusion
Mastering fried chicken is an art that needs technique, passion, and practice. This guide has given you the skills to make your kitchen a place of crispy, delicious chicken. You now know how to pick quality chicken and create the perfect coating.
Every great chef starts with patience and a willingness to try new things. You’ve learned important techniques like buttermilk soaking and precise temperature control. These are your keys to success in the kitchen. Don’t be afraid to change recipes and make them your own.
Cooking is about expressing yourself and having fun. Whether it’s for a family meal or to impress friends, your fried chicken will impress. As you practice, your skills will get better, and you’ll make dishes that everyone will love.
Your kitchen is now a place where you can create delicious masterpieces. Keep learning, trust your instincts, and try new flavors and techniques. With hard work, you’ll become an expert at making fried chicken that everyone will enjoy.